이 글은 안드로이드에서 사진을 찍은 후 원본 이미지를 파일로 저장하고 ImageView에 해당 사진 이미지를 표시하는 예제이다.
먼저 카메라 기능 및 외부 저장소에 대한 읽기/쓰기 퍼미션을 지정하기 위해 AndroidManifest.xml에 다음 코드를 추가한다.
<uses-permission android:name="android.permission.WRITE_EXTERNAL_STORAGE" />
<uses-permission android:name="android.permission.CAMERA" />
<uses-permission android:name="android.permission.READ_EXTERNAL_STORAGE" />
<uses-feature android:name="android.hardware.camera2" android:required="true" />
이왕 AndroidManifest.xml 파일을 편집하는 김에 Provider를 추가하자. Provider를 추가하는 이유는 외부 카메라 앱을 연동해서 사진을 찍을 건데, 카메라 앱이 사진을 찍은 후 지정된 파일에 사진 이미지를 저장하도록 하기 위해 파일에 대한 Provider가 필요하기 때문이다. 추가한 코드는 다음과 같다.
<application ... >

    <provider
        android:authorities="com.example.myapplication.fileprovider"
        android:name="androidx.core.content.FileProvider"
        android:exported="false"
        android:grantUriPermissions="true">
        <meta-data
            android:name="android.support.FILE_PROVIDER_PATHS"
            android:resource="@xml/file_paths" />
    </provider>

    ...
위의 Provider 코드 중 android:authorities 속성값에는 App의 Package명에 “.fileprovider”를 붙여 지정하였다. 파일 Provider가 외부의 앱에 공유하고자 하는 디렉토리를 meta-data에 지정하고 있는데 xml 파일은 file_paths에 관련 정보를 지정했으며 다음과 같다. 리소스에 xml 폴더를 만든 후에 file_paths.xml 파일을 추가한 뒤 아래의 내용을 입력한다.
<?xml version="1.0" encoding="utf-8"?>
<paths xmlns:android="http://schemas.android.com/apk/res/android">
    <external-path name="files" path="Android/data/com.example.myapplication/files" />
</paths>
위의 내용은 이 앱이 접근할 수 있는 디렉토리인 Android/data/com.example.myapplication/files의 하위 폴더 전체를 공유할 수 있다.
카메라를 실행하고 사진을 찍어 그 내용을 표시하는 UI에 대한 레이아웃은 다음과 같다.
<?xml version="1.0" encoding="utf-8"?>
<LinearLayout xmlns:android="http://schemas.android.com/apk/res/android"
    android:orientation="vertical"
    android:layout_width="match_parent"
    android:layout_height="match_parent">

    <Button
        android:layout_width="100dp"
        android:layout_height="58dp"
        android:id="@+id/btn_photo"
        android:layout_gravity="center"
        android:text="사진찍기" />


    <ImageView
        android:id="@+id/iv_photo"
        android:layout_width="match_parent"
        android:layout_height="match_parent" />

</LinearLayout>
이제 이 레이아웃에 대한 Activity 코드는 다음과 같다.
package com.example.myapplication

import android.Manifest
import android.content.Intent
import android.content.pm.PackageManager
import android.graphics.ImageDecoder
import android.net.Uri
import android.os.Build
import androidx.appcompat.app.AppCompatActivity
import android.os.Bundle
import android.os.Environment
import android.provider.MediaStore
import android.util.Log
import android.widget.Button
import android.widget.ImageView
import androidx.core.app.ActivityCompat
import androidx.core.content.FileProvider
import java.io.File
import java.io.IOException
import java.text.SimpleDateFormat
import java.util.*

class MainActivity : AppCompatActivity() {
    val TAG = "DIP2K"
    lateinit var btn_photo: Button
    lateinit var iv_photo: ImageView

    var m_imageFile: File? = null
    val REQUEST_TAKE_PHOTO = 100

    override fun onCreate(savedInstanceState: Bundle?) {
        super.onCreate(savedInstanceState)
        setContentView(R.layout.activity_main)

        iv_photo = findViewById(R.id.iv_photo)
        btn_photo = findViewById(R.id.btn_photo)

        if(Build.VERSION.SDK_INT >= Build.VERSION_CODES.M) {
            if(checkSelfPermission(Manifest.permission.CAMERA)
                == PackageManager.PERMISSION_GRANTED
                && checkSelfPermission(Manifest.permission.WRITE_EXTERNAL_STORAGE)
                    == PackageManager.PERMISSION_GRANTED) {
            } else {
                ActivityCompat.requestPermissions(this,
                    arrayOf(Manifest.permission.CAMERA, Manifest.permission.WRITE_EXTERNAL_STORAGE), 1)
            }
        }

        btn_photo.setOnClickListener {
            val takePictureIntent = Intent(MediaStore.ACTION_IMAGE_CAPTURE)
            if(takePictureIntent.resolveActivity(getPackageManager()) != null) {
                createImageFile()?.let {
                    val photoURI = FileProvider.getUriForFile(this,
                        "com.example.myapplication.fileprovider", it)

                    takePictureIntent.putExtra(MediaStore.EXTRA_OUTPUT, photoURI)
                    startActivityForResult(takePictureIntent, REQUEST_TAKE_PHOTO)

                    m_imageFile = it
                }
            }

        }
    }

    override fun onRequestPermissionsResult(
        requestCode: Int,
        permissions: Array<out String>,
        grantResults: IntArray
    ) {
        super.onRequestPermissionsResult(requestCode, permissions, grantResults)

        if(grantResults[0] == PackageManager.PERMISSION_GRANTED
            && grantResults[1] == PackageManager.PERMISSION_GRANTED) {
            Log.d(TAG, "Permisson: " + permissions[0] + " was " + grantResults[0])
        }
    }

    override fun onActivityResult(requestCode: Int, resultCode: Int, data: Intent?) {
        super.onActivityResult(requestCode, resultCode, data)
        if(requestCode == REQUEST_TAKE_PHOTO) {
            if(resultCode == RESULT_OK) {
                m_imageFile?.let {
                    if(Build.VERSION.SDK_INT >= Build.VERSION_CODES.Q) {
                        val source = ImageDecoder.createSource(contentResolver, Uri.fromFile(it))
                        ImageDecoder.decodeBitmap(source)?.let {
                            iv_photo.setImageBitmap(it)
                        }
                    } else {
                        MediaStore.Images.Media.getBitmap(contentResolver, Uri.fromFile(it))?.let {
                            iv_photo.setImageBitmap(it)
                        }
                    }
                }
            }
        }
    }

    private fun createImageFile(): File {
        val timeStamp = SimpleDateFormat("yyyyMMdd_HHmmss").format(Date())
        val imageFileName = "PHOTO_${timeStamp}.jpg"
        val storageDir = getExternalFilesDir(Environment.DIRECTORY_PICTURES)
        return File(storageDir, imageFileName)
    }
}
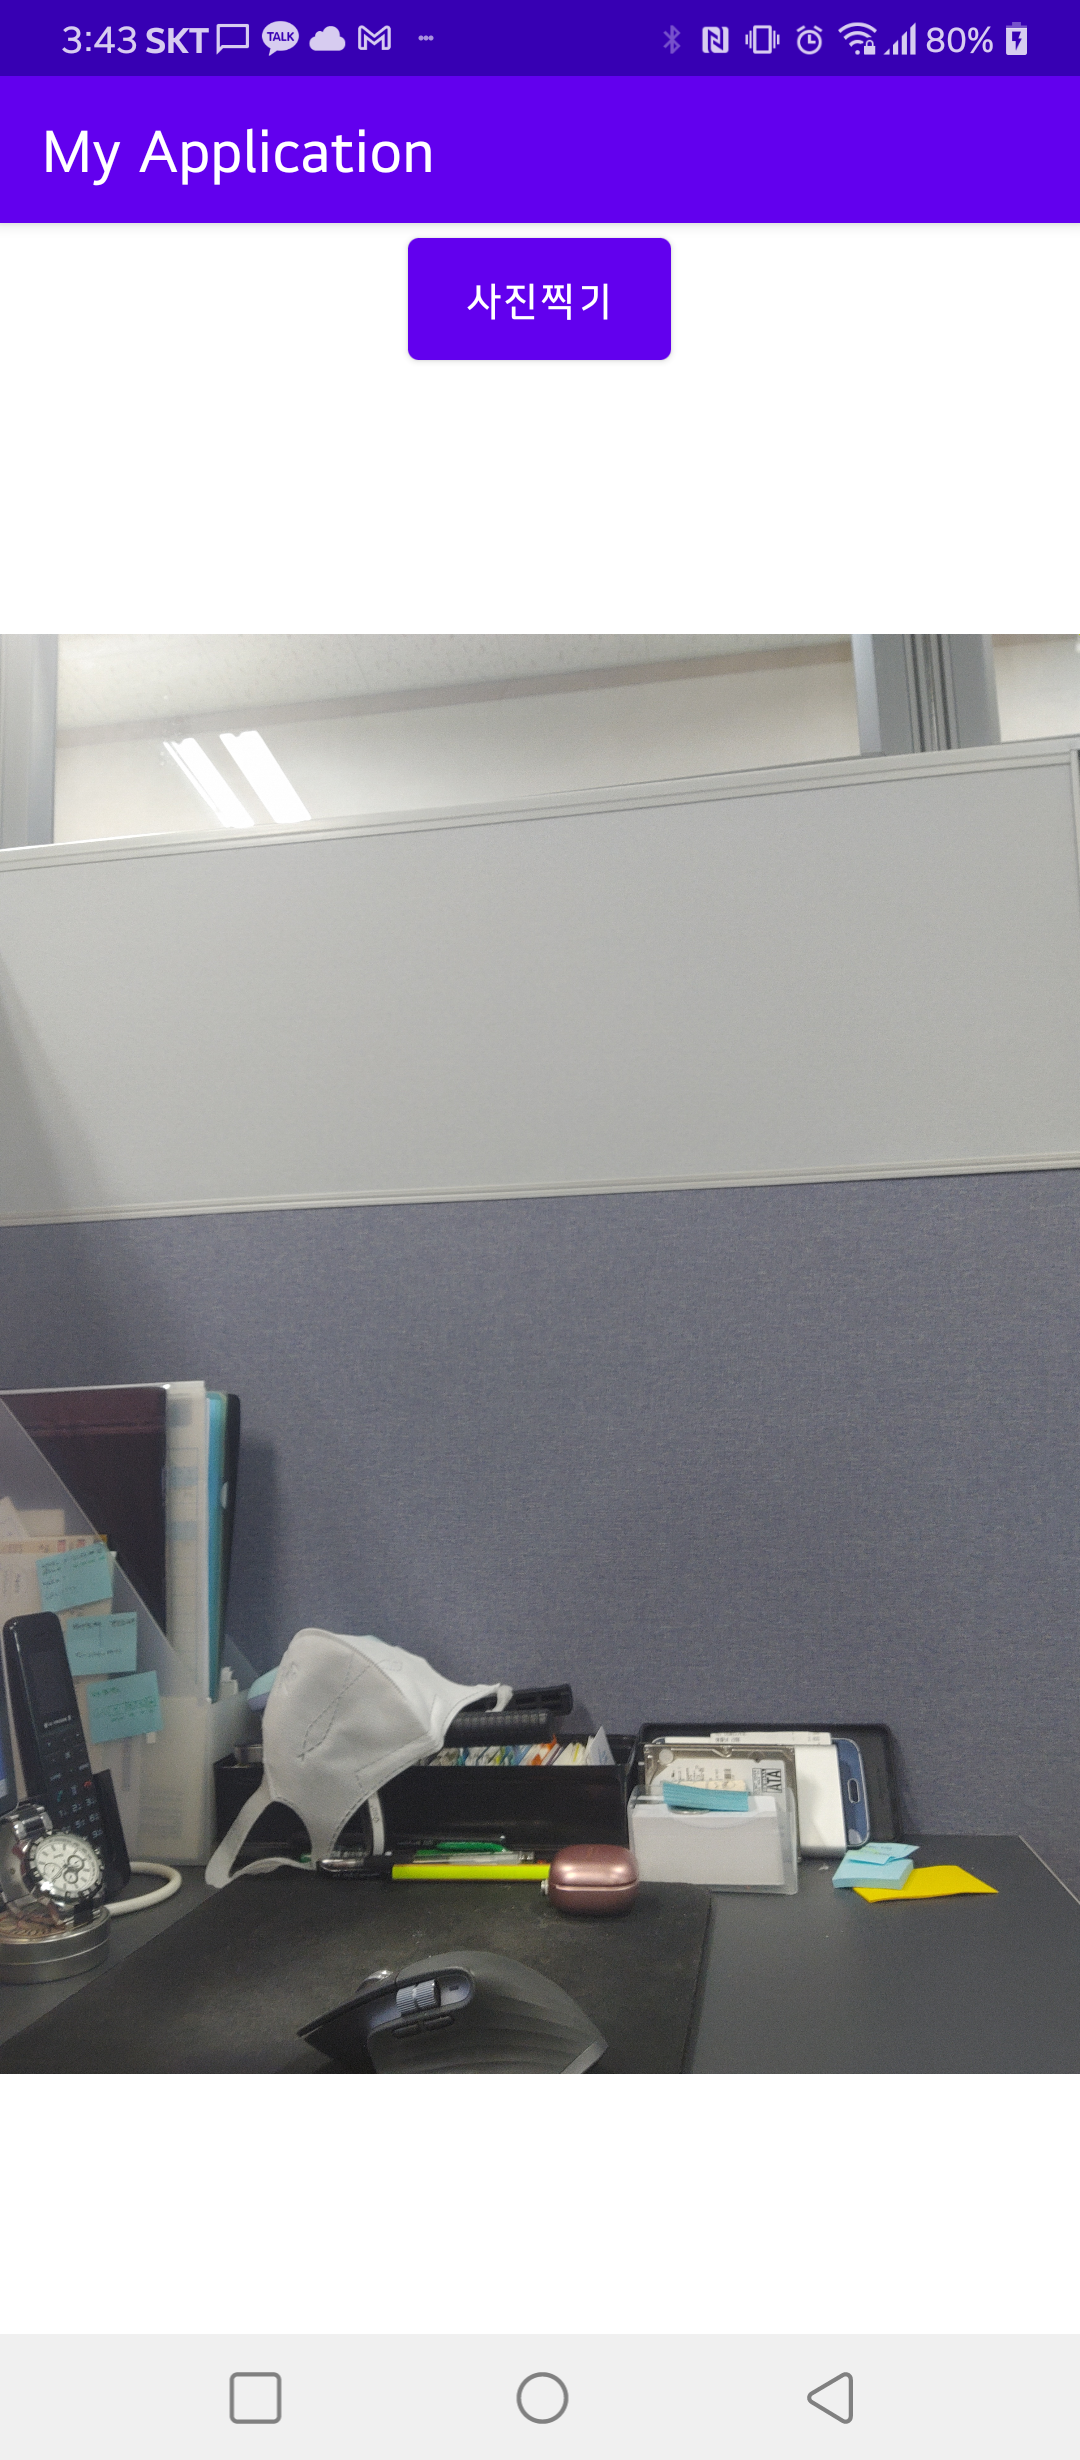
실행 결과는 다음과 같다.