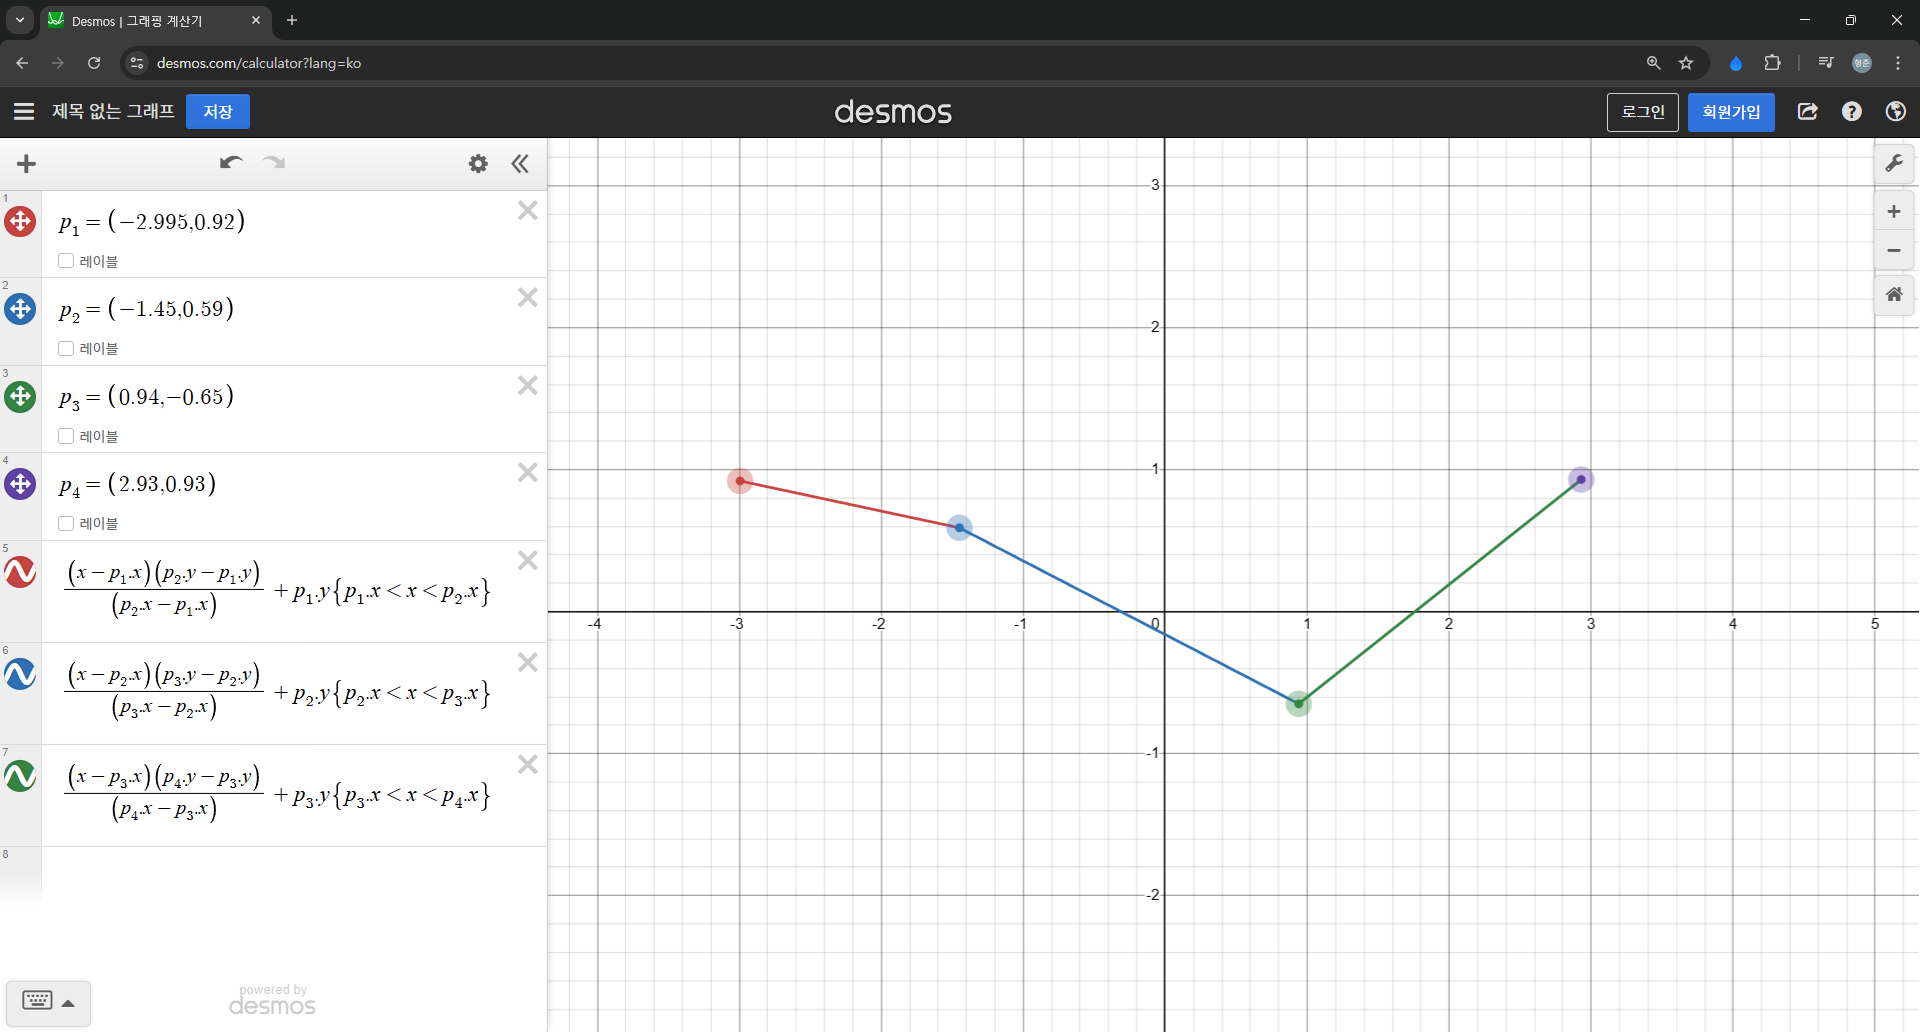
Linear Interpolation (선형 보간)
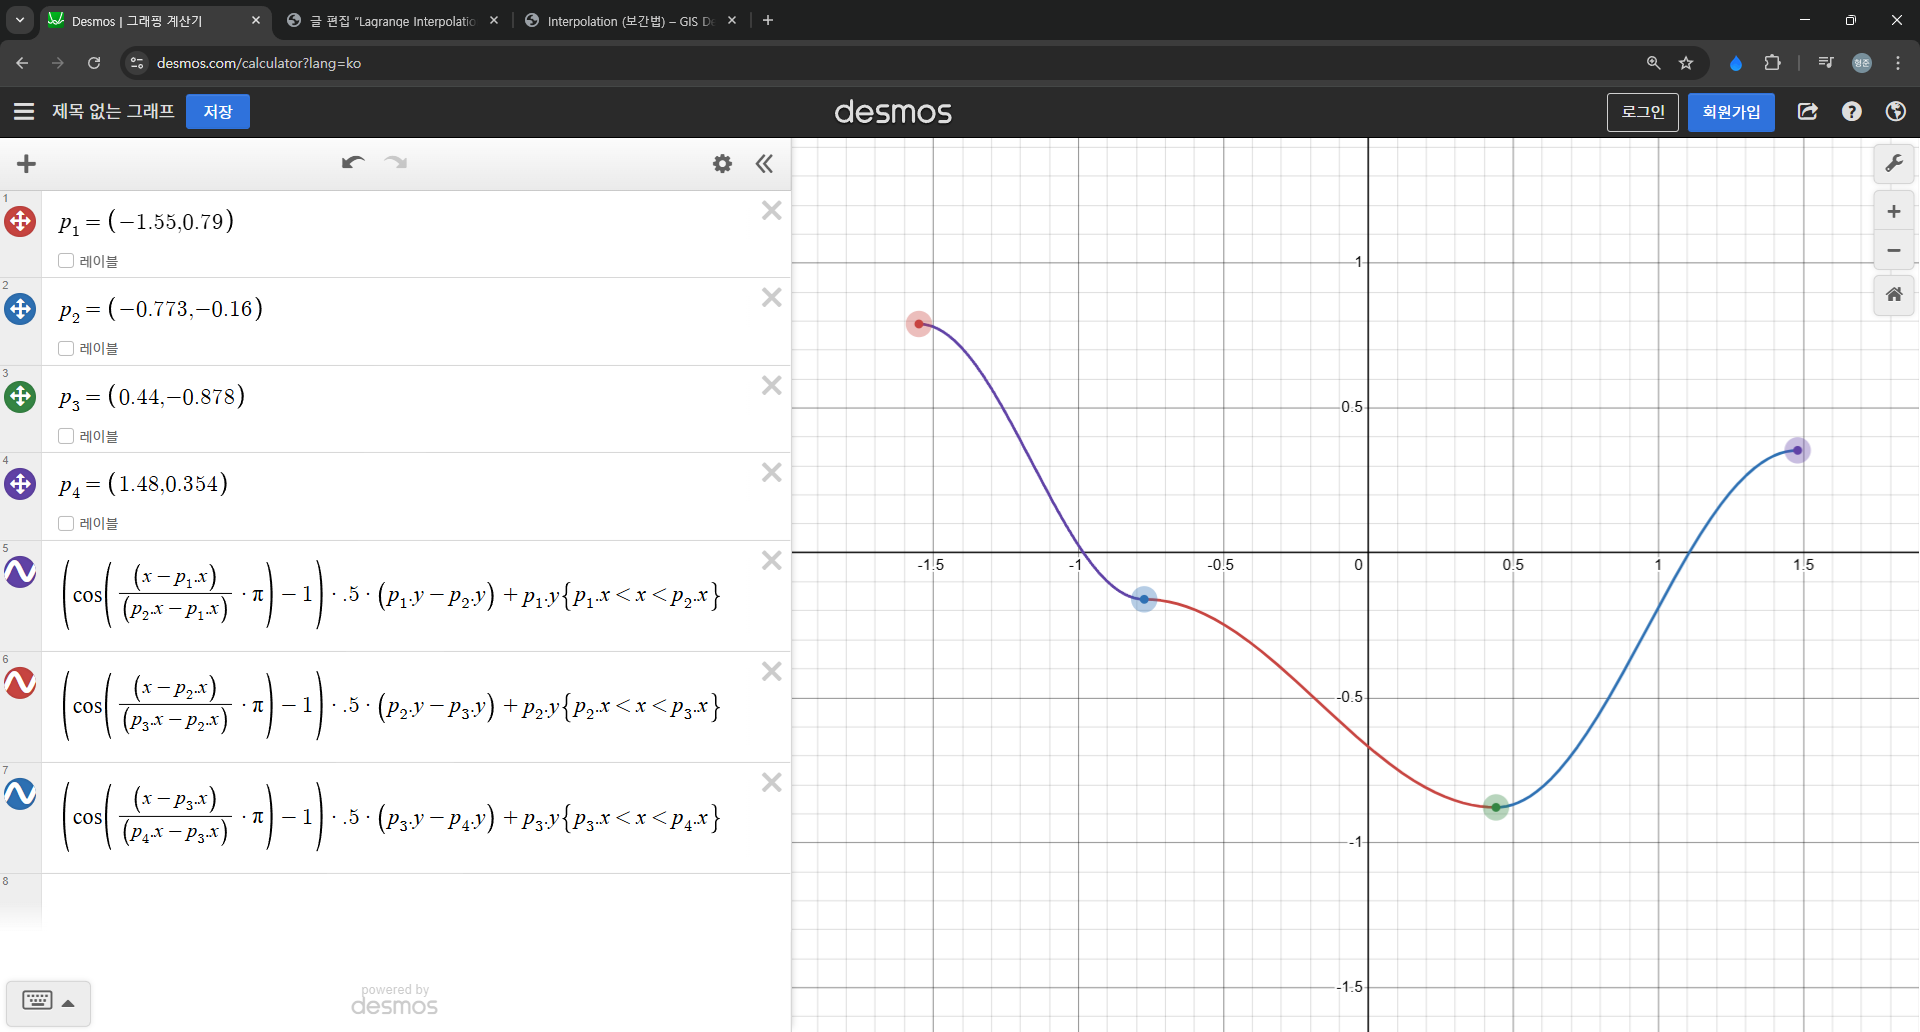
Cosin Interpolation (코사인 보간)
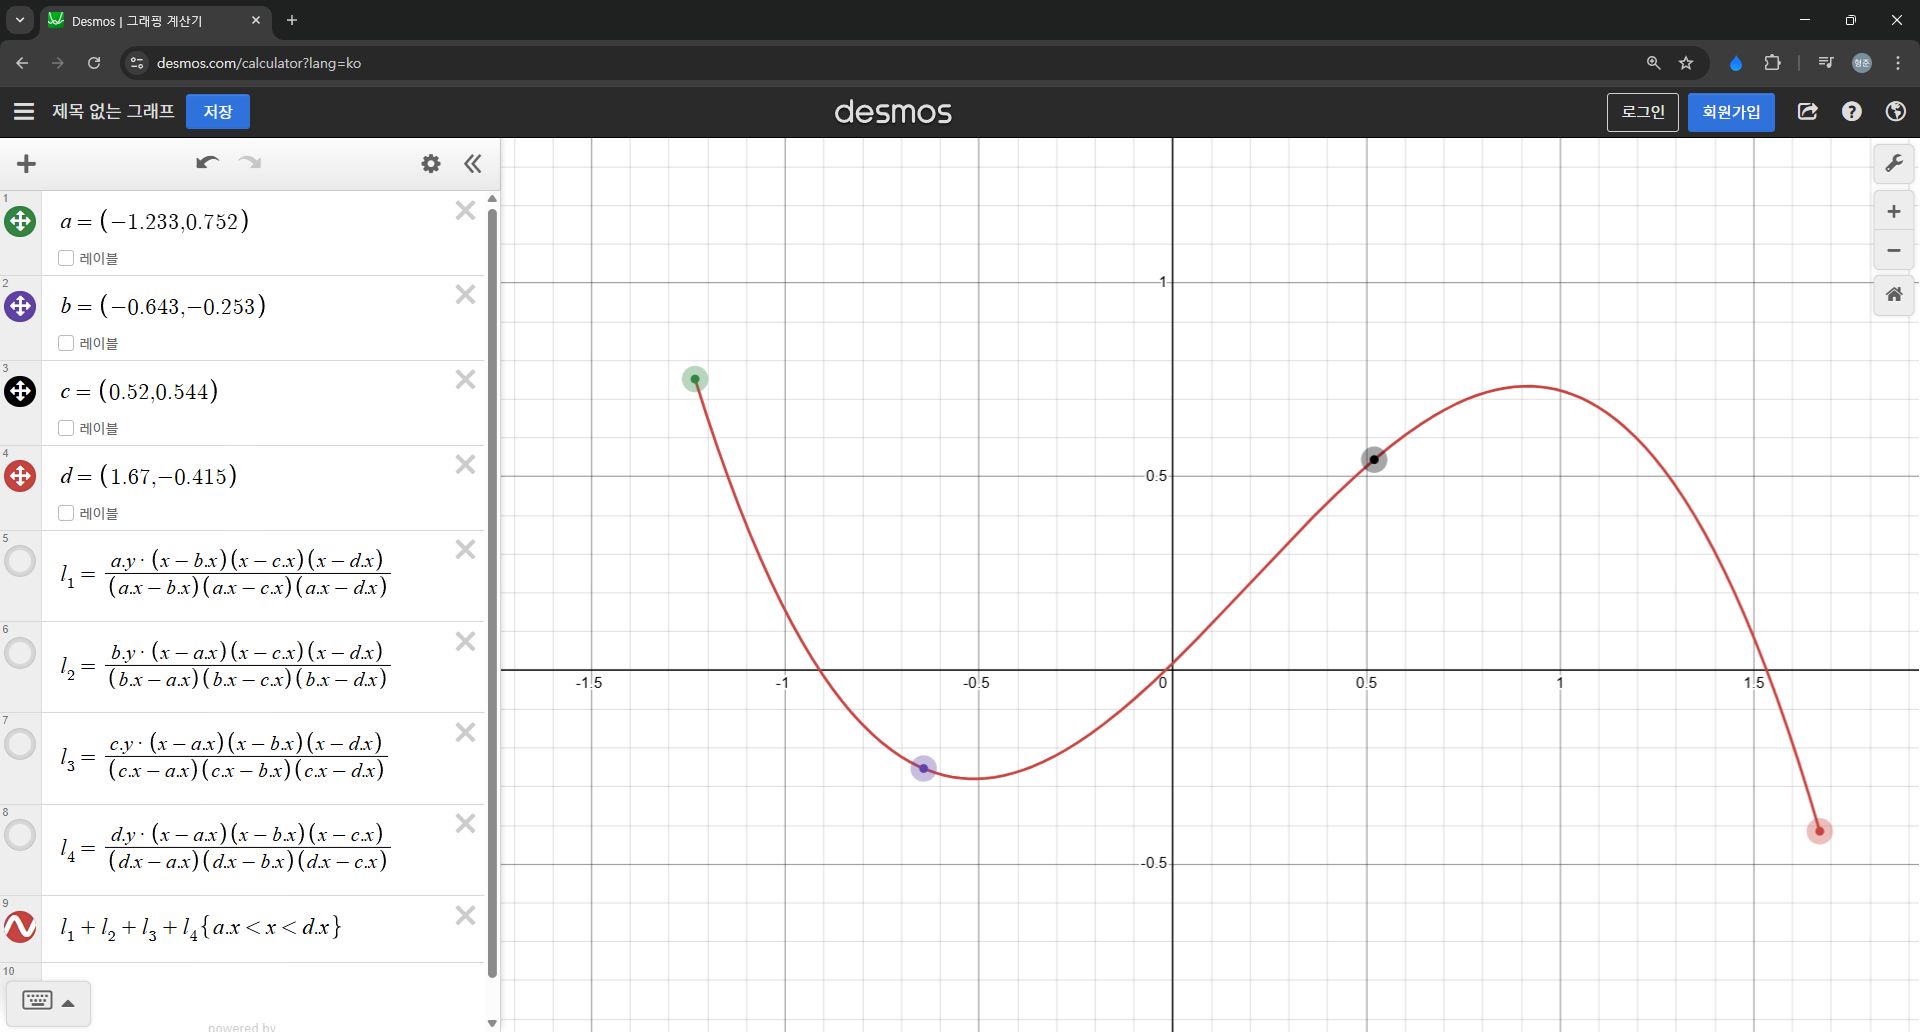
Lagrange Interpolation (라그랑주 보간)

공간정보시스템 / 3차원 시각화 / 딥러닝 기반 기술 연구소 @지오서비스(GEOSERVICE)
DOM 구성은 다음과 같다.
CSS는 다음과 같다.
body {
  background: #bdcddb;
}

.loader {
  position: relative;
  width: 300px;
  height: 300px;
}

.circle {
  position: absolute;
  inset: 35px;
  background-color: #acbaca;
  border-radius: 50%;
  box-shadow: 5px 5px 15px 0 #152b4a66,
    inset 5px 5px 5px rgba(255,255,255,0.55),
    -6px -6px 10px rgba(255,255,255,1);
}

.circle::before {
  content: '';
  position: absolute;
  inset: 4px;
  background: linear-gradient(#2196f3, #e91e63);
  border-radius: 50%;
  animation: animate 2s linear infinite;
}

@keyframes animate {
  0% {
    transform: rotate(0deg);
  }

  100% {
    transform: rotate(350deg);
  }
}

.circle::after {
  content: '';
  position: absolute;
  inset: 35px;
  background: #acbaca;
  border-radius: 50%;
}

.circle span {
  position: absolute;
  inset: 4px;
  background: linear-gradient(#2196f3, #e91e63);
  border-radius: 50%;
  animation: animate 2s linear infinite;
  filter: blur(20px);
  z-index: 1000;
  /* mix-blend-mode: color-dodge; */
  mix-blend-mode: plus-lighter;
}

.circle span::before {
  content: '';
  position: absolute;
  inset: 40px;
  background: #bdcbdb;
  border-radius: 50%;
  animation: animate 2s linear infinite;
  z-index: 1000;
}
결과는 다음과 같다.

CSS의 67번째 줄이 핵심인데, 만약 해당 코드를 제거하면 결과는 다음과 같다.

mix-blend-mode의 값인 plus-lighter는 아직 공식적으로 문서화가 되지 않았고 만약 작동하지 않는다면 color-dodge를 사용하기 바란다. 참고로 color-dodge보다 plus-lighter가 광원의 표현에 더욱 적합하다.

위에서 a와 b는 모양 함수(Shape Function)인데, a와 b의 값에 대한 min 또는 max 값을 취하면 a와 b를 하나로 섞을 수 있다. 그런데 a와 b의 교차점에서 매우 날카롭게 섞이게 되는데, 이를 부드럽게 섞은 것이 세번째 함수의 결과이다. 세번째 함수를 보면 k, h, m으로 구성되는데 이 중 k의 값에 따라 얼마나 부드럽게 섞을 것인지 결정한다. k 값이 음수일때 max 값으로 섞고 양수일때 min 값으로 섞는다.
float smin(float a, float b, float k) {
  float h = clamp(.5 + .5 * (b - a) / k, 0., 1.);
  return mix(b, a, h) - k * h * (1. - h);
}
uniform vec3 uResolution;
uniform float uTime;
uniform vec4 uMouse;
// v = a -> 0
// v = b -> 1
// v = (a+b)/2 -> 0.5
float remap01(float a, float b, float v) {
return (v - a) / (b - a);
}
void main() {
vec2 uv = (gl_FragCoord.xy - .5 * uResolution.xy) / uResolution.y;
vec3 col = vec3(0);
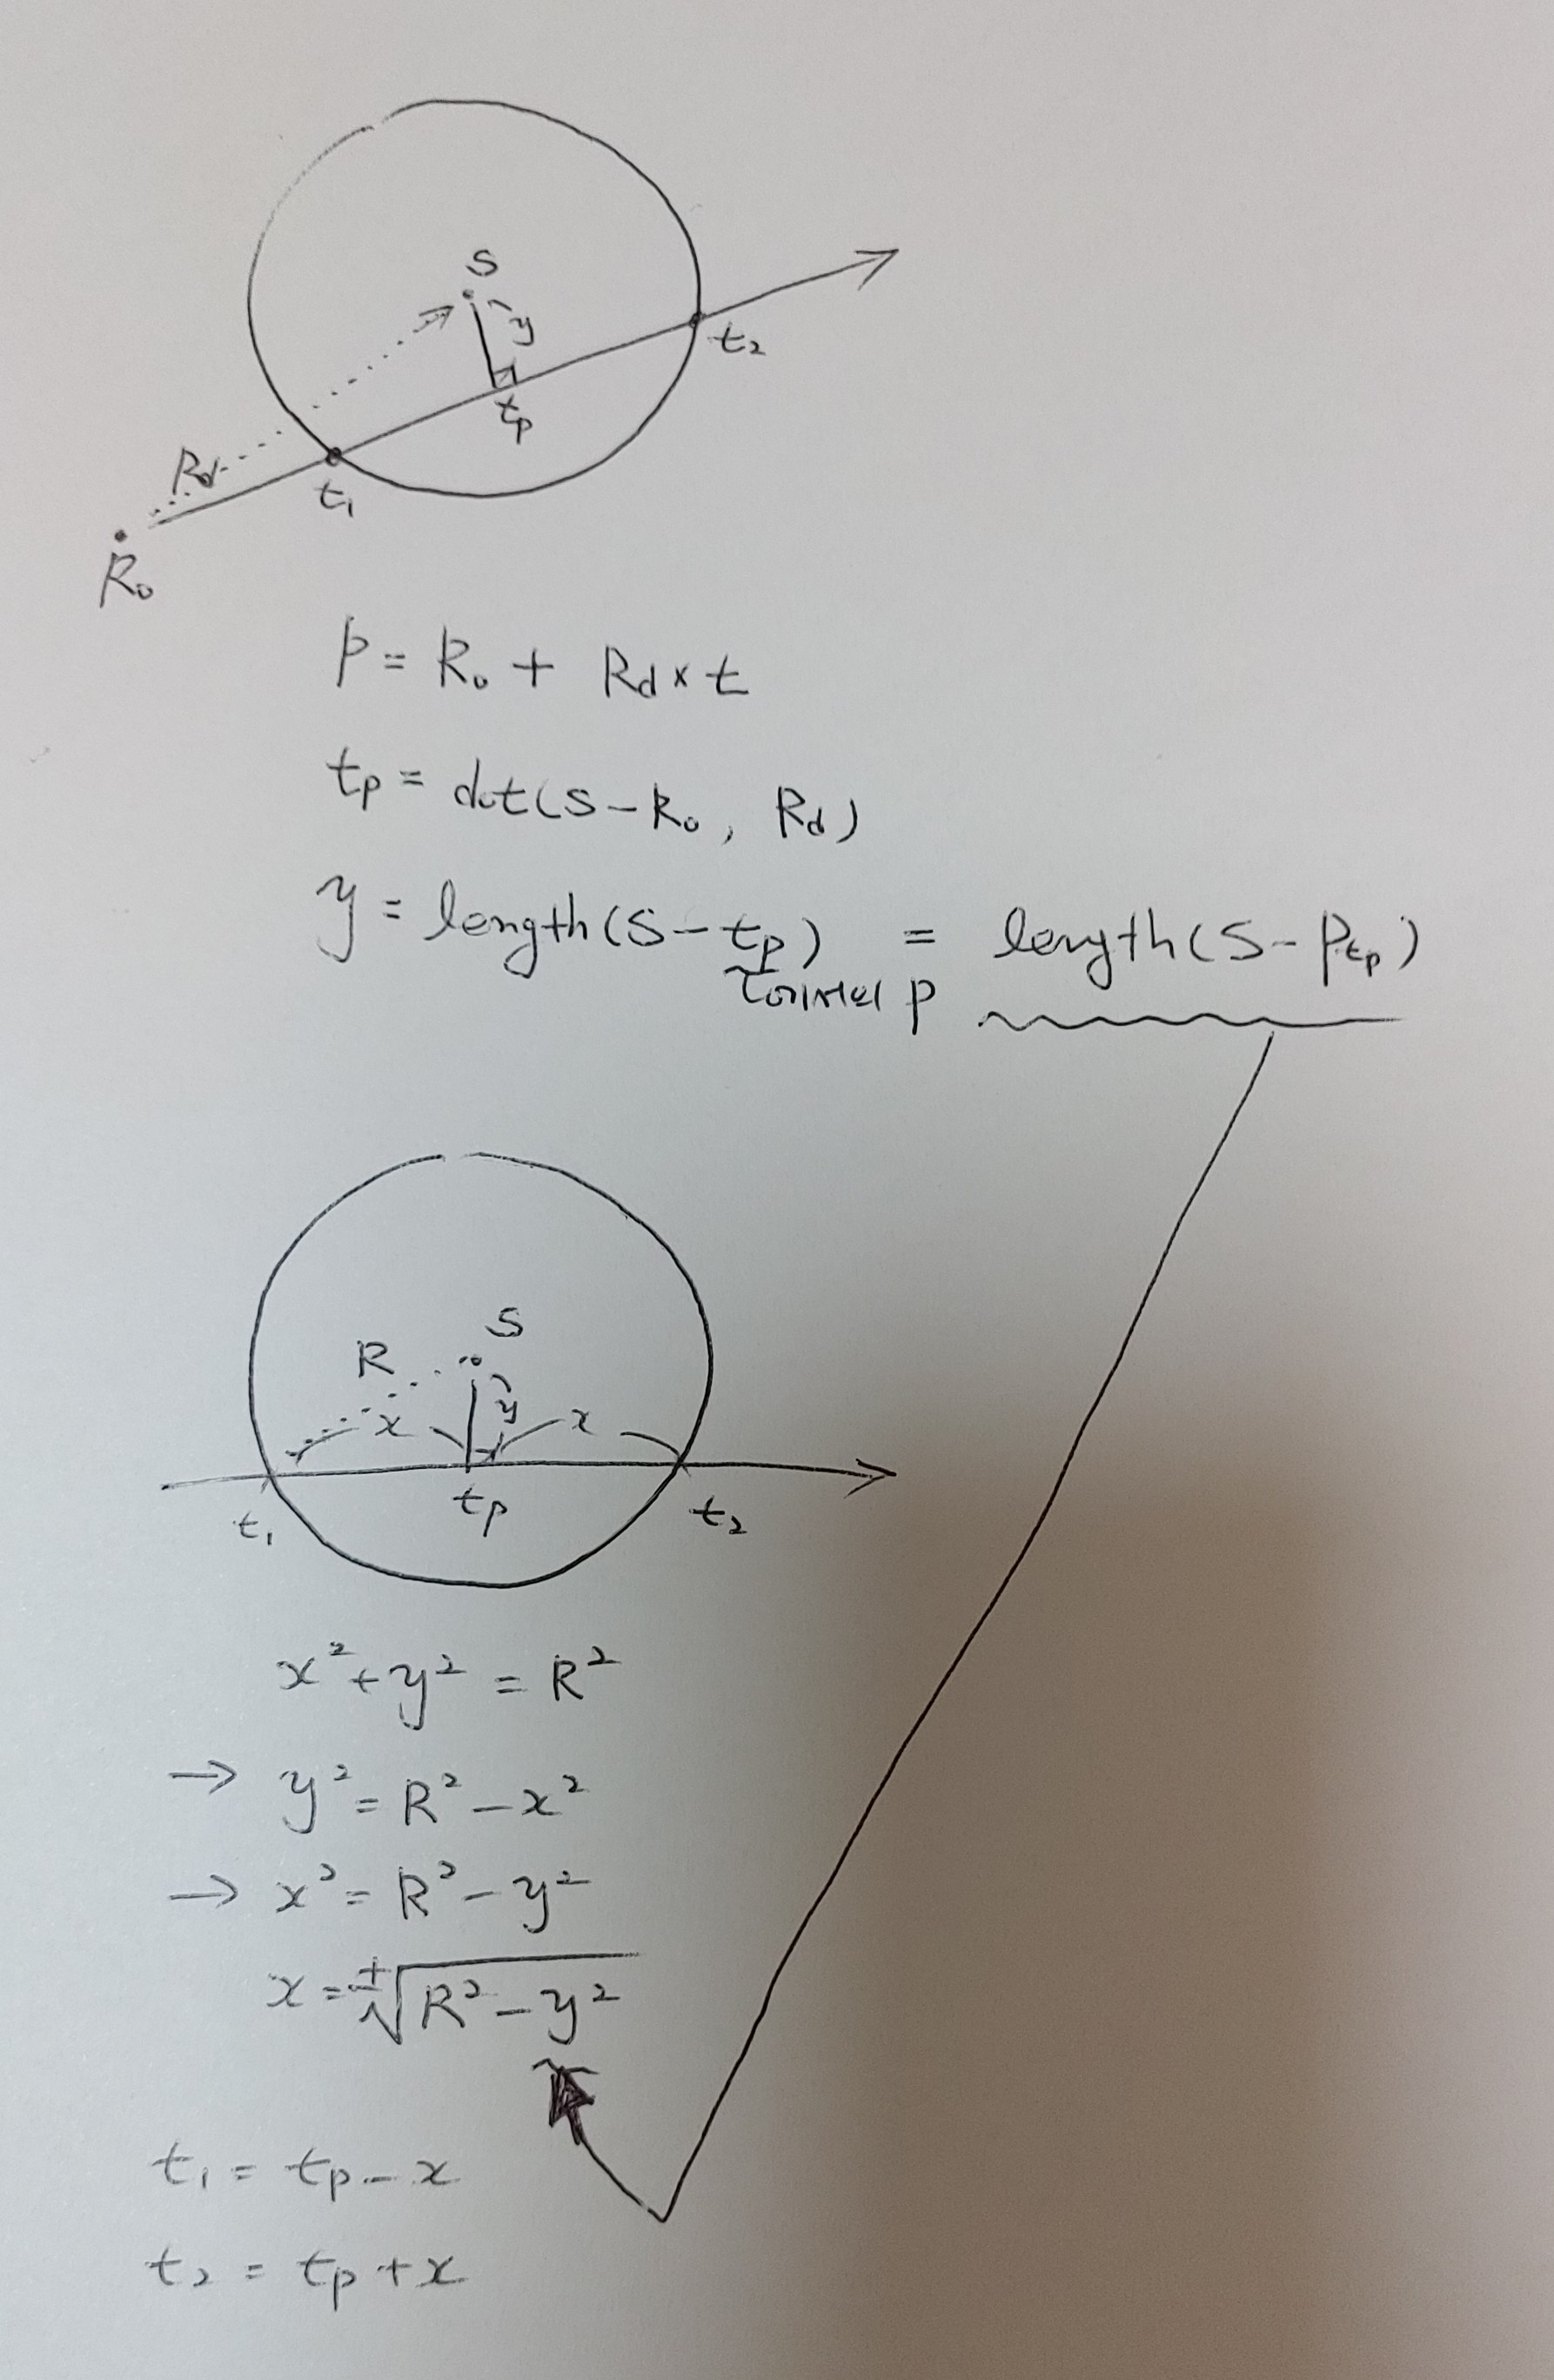
vec3 Ro = vec3(0);
vec3 Rd = normalize(vec3(uv.x, uv.y, 1.));
vec3 S = vec3(0, 0, 3);
float R = 1.;
float tp = dot(S - Ro, Rd);
vec3 Ptp = Ro + Rd * tp;
float y = length(S - Ptp);
if(y < R) {
float x = sqrt(R*R - y*y);
float t1 = tp - x;
float t2 = tp + x;
float c = remap01(S.z, S.z - R, t1);
col = vec3(c);
}
gl_FragColor = vec4(col, 1.0);
}

  // if(p.x > .5 || p.y > .5) col.r = .8;
  if(max(p.x, p.y) > .5) col.r = .8;
  // col.r = step(.5, max(p.x, p.y));
  float a = radians(45.);
  vec2 n = vec2(sin(a), cos(a));
  float d = dot(uv, n);
  d = abs(d);
  col += smoothstep(fwidth(d), 0., d-.001);
function prepareOneFish() {
  let start = new Date().getTime();
  while (new Date().getTime() < start + 1000) {
    // preparing fish
  }
}
function setTimeoutPromise(delay) {
  return new Promise((resolve, reject) => {
    setTimeout(resolve, delay);
  });
}

function setTimeoutPromise(delay) {
  return new Promise((resolve) => setTimeout(resolve, delay));
}